 Last night I was craving one of my favorite salads–Sticky Wingers Chicken Salad. I usually grill the chicken for this salad out of sheer laziness, but last night decided I wanted to once and for all figure out a low fat crispy chicken nugget. So..we were a little like America’s Test Kitchen last night and made chicken nuggets three different ways–no-fat, low fat and all-fat. All three methods ended up being plain scrumptious, so I thought I would share my findings with you.
The real secret ingredient or trick to a crispy chicken nugget was Panko Japanese breadcrumbs. I am sure most of you have already found this magical ingredient, but for those of you behind the times (like me!), I will introduce it to you. Panko has the texture of an instant potato flake–it’s light, airy and very fine. It is normally used to bread seafood because of it’s delicate texture. However, it is perfect for chicken too. It is fairly expensive (a 12 oz. box at Wally’s was about $2), but worth the cost! Here is what I did with the Panko.

Steps to the perfectly crisp chicken nugget:
Step 1: Cut your chicken into medium sized pieces (it will help your chicken cook more quickly and to not over cook them). Try to keep all of the chicken pieces uniform in size.
Step 2: Get your three bowls ready for breading. You will need one with seasoned flour or cornstarch, one with egg/water and the other with Panko (or breadcrumbs). One tip..don’t worry about over seasoning! It would take a lot to over season your flour mixture! I like Red Robin’s Season-all Salt Blend (you can buy it from their restaurant), coarse black pepper, garlic powder, paprika and cayenne pepper. I don’t have exact measurements, just add what you like and a lot of it! (I used 4 chicken breasts and I found I needed about 1 1/2 c. flour, 3 eggs with 2 T. water, and 2-2 1/2 c. panko).
Step 3: Place your chicken pieces into the flour mixture until it is covered in flour. Shake off any excess. Dip the chicken piece into your egg mixture and coat. If you want a really thick coating you can do these two steps over again–flour and then egg. For a regular coating, after you have dipped the chicken in the egg, roll it around in the panko until it is completely covered with panko.
Now..for the different cooking methods.
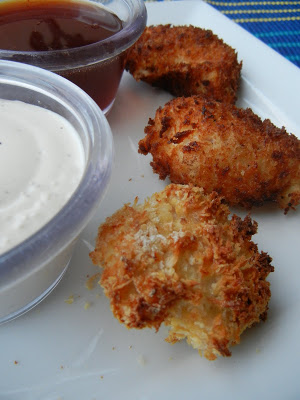
NO-FAT Method: Place the breaded chicken pieces on a cookie sheet or wire rack that has been sprayed with cooking spray. Place the wire rack on top of a large jelly roll pan. Bake on the middle rack of your oven at 425 degrees for 10-12 minutes (don’t overbake or you will have dry chicken! Test the chicken pieces after several minutes to see if you need more time.) The chicken is done when it is still moist, white in color and you can see the juices running clear. Your nuggets are over cooked when they are dry, flaky and there are no juices remaining. This method I think was the winning method for me! They were still moist, golden brown and the fact they are so much lower in fat is a big plus for me. The trick that makes them crispy is the wire rack, it will be crispy on all sides. (I think the next I use this method I will spray or drizzle a little melted butter or olive oil over the chicken to give it a little more flavor and help it bake up even more golden brown)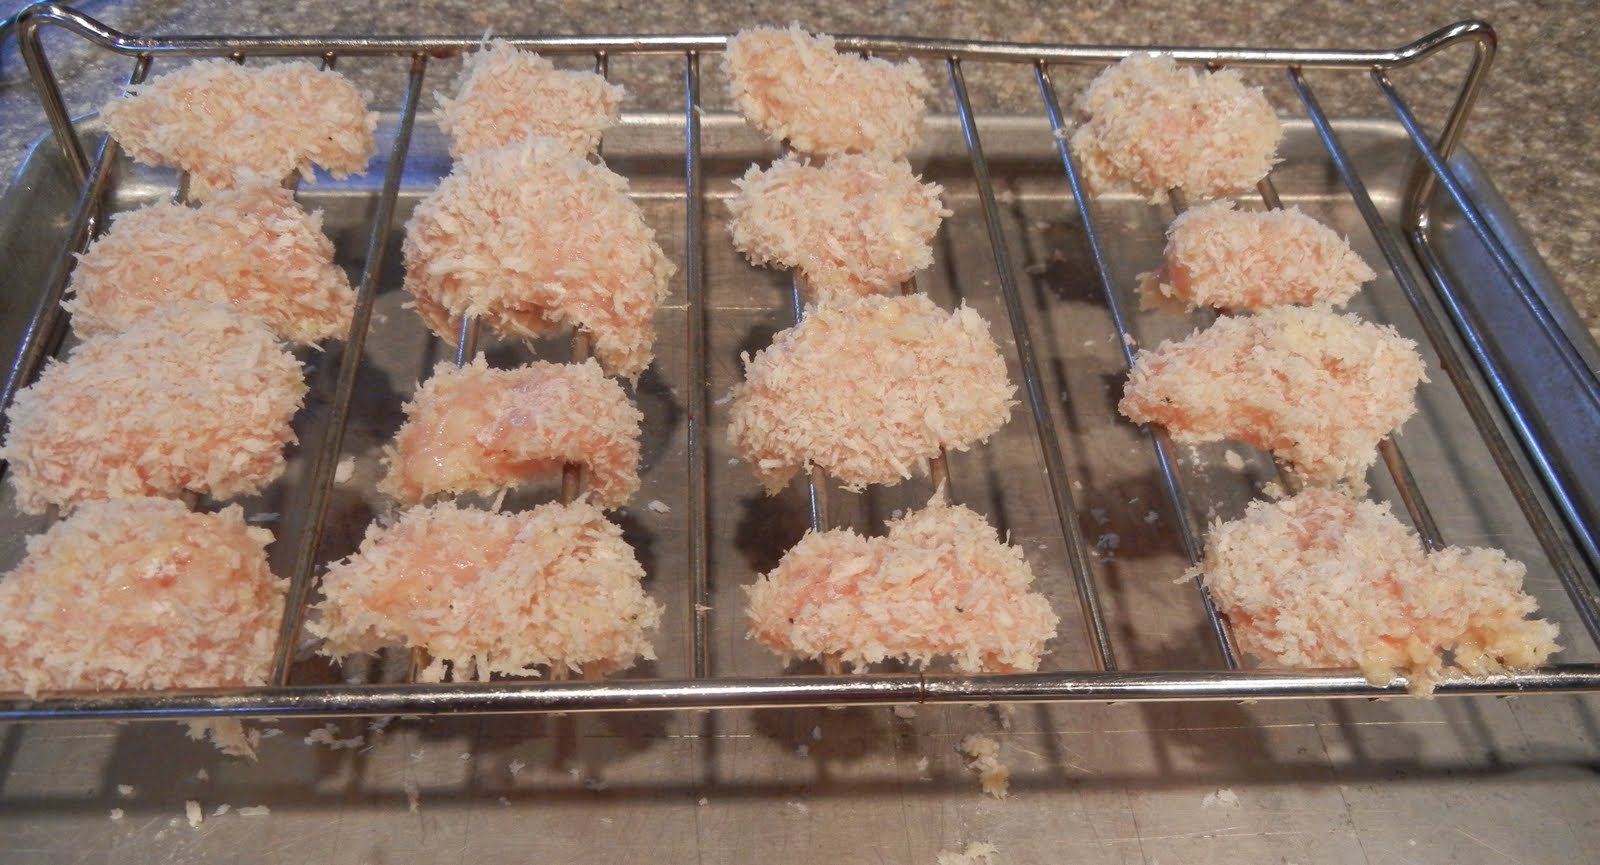

LOWER FAT METHOD: For a lower in fat method, I breaded the chicken as normal, but then I only deep fried one side of the nugget. I quickly placed the chicken in the 1/2 inch of oil for a few seconds until it became lightly browned and then I removed it from the pan. I placed it on a paper towel and then continued the baking process with the grilled side down on a wire rack (just like I did with the no-fat method). They only needed another 5-7 minutes until they were perfect.


ALL-FAT METHOD: The full fat version of these nuggest was to deep fry them on both sides for the entire cooking process. The size of chicken I cut took about 5 minutes in the hot oil (about 2 1/2 min. per side). Careful not to let these burn. Your oil will not want to be as hot with this method or the panko will become too dark. This method obviously made for the prettiest golden brown chicken nugget, but not the healthiest!

So..next time you are wanting to make the perfect homemade chicken nugget, choose your method, choose your caloric choice, and use panko crumbs.
Need a fun dinner to use these chicken nuggets with? Try this awesome recipe for Wingers Sticky Chicken Salad. The sticky dressing and ranch are the perfect combination for dipping these babies in. Enjoy!!

**One frugal tip. I feel like this one would even make my grandmother proud 🙂 When you empty out your cereal bags, shake them out and keep them for breading chicken or meats. They are a great heavy duty (and free) bag for dredging. I just cut up the chicken, put the flour and seasonings into the cereal bag and then shake & then bake. With a three step breading process like above this wouldn’t work, but for one where you are just covering your meat in one flour/cornstarch mixture, this works perfectly!